Designing an Accessible Online Course
An Introduction to Accessible Design
Design is powerful in its ability to include some, and exclude others. When the design of a course is approached in a thoughtful and inclusive way, it creates an educational environment where all students have an opportunity to learn and demonstrate their mastery of the course content. Design that does not take into consideration the variety of ways students access online content differentially impacts certain students. If a course is not designed accessibly up front, some students with disabilities are burdened with the need to work with the disability service office to obtain access. They are immediately put at a disadvantage when compared to nondisabled students.
What Does It Mean to Create an Accessible Online Course?
A well-designed course is more usable for all students. The design also takes into consideration that not all students navigate or access the online environment in the same way. This toolkit focuses on three key principles:
- Intuitive: The layout of the course is simple, consistent and predictable.
- Perceivable: The content is designed so that it can be perceived by a wide range of users, regardless of disability.
- Navigable: Course navigation does not assume that the student is using a specific device, such as a mouse. A user can navigate the course using the keyboard alone or with the use of assistive technology in ways that are equally effective.
Designing in ways that consider these principles will go a long way toward improving access for students with disabilities. This toolkit is not meant to be comprehensive. It also does not address specific learning management systems (LMS). You are encouraged to also consult the documentation for your particular LMS to see if there are tips and tools to enhance accessibility.
Learning management systems (LMSs) differ widely in their accessibility. If the LMS you use is not compatible with assistive technologies or keyboard-only navigation, your course materials will be inaccessible to some students—even if your content design follows best practices. Check with your campus disability resource office or instructional design team to learn more about the accessibility of your institution’s LMS. If you plan to use a different platform, choose one that offers the highest level of accessibility for all students.
Place a statement in a prominent location in your course syllabus that lets students know you are committed to accessibility and explains how to request accommodations. Your college or university may have a required or recommended statement—if not, here are two examples you can adapt.
Students with Disabilities: If you anticipate issues related to the format or requirements of this course, please contact me. I would like us to discuss ways to ensure your full participation in the course. Together we can plan how best to remove barriers and coordinate your accommodations. You are also welcome to contact the disability resource office [insert office contact information].
Usability, disability and design: I am committed to creating a course that is inclusive in its design. If you encounter barriers, please let me know immediately so that we can determine if there is a design adjustment that can be made or if an accommodation might be needed to overcome the limitations of the design. I am always happy to consider creative solutions as long as they do not compromise the intent of the assessment or learning activity. You are also welcome to contact the disability resource office [insert office contact information] to begin this conversation or to establish accommodations for this or other courses. I welcome feedback that will assist me in improving the usability and experience for all students.
Sharing course content in MS Word is common and can be simple and effective. As you design MS Word documents, make sure you are taking accessibility into account.
Be sure do the following:
- Use 12-point or larger size fonts that are clear and easy to read.
- Sans serif fonts like Arial and Helvetica are good options
- Use italics, all caps and small caps sparingly.
- Use colors that provide good contrast.
- Use headings (created by using the styles tool) to structure the document.
- Add alternative text to images, charts and graphs.
- Create links by using meaningful text descriptions.
- Avoid the use of SmartArt.
- Avoid adding text boxes.
- Avoid putting important information in headers or footers.
- Avoid using color alone to convey meaning.
- If converting to PDF, choose “Save As” or “Export to” PDF, not Print to PDF.
Once you have created your document, use the Accessibility Checker in MS Word to see if there are ways you can improve it.
More Resources: Accessible MS Word Documents
PDFs can be an effective and accessible way to share course materials—but only if they’re created correctly. If not, they can be completely inaccessible to students who use screen readers or other assistive technologies.
- Start with an accessible source document. Following the earlier recommendations for creating accessible Microsoft Word documents will set a strong foundation for an accessible PDF.
- Save as a PDF (don’t print to PDF). When exporting your document, choose Save as PDF rather than Print to PDF to preserve accessibility features such as headings and alt text.
- Check complex documents. Simple documents often convert cleanly, but more complex layouts (tables, multiple columns, or images) may require an accessibility review or remediation.
- Run an accessibility check. If you have Adobe Acrobat Pro, you can use the built-in accessibility checker to identify common issues.
- Ask for campus support. Your disability resource office may offer assistance or training for ensuring PDF accessibility.
- Verify third-party PDFs. Always check materials created by others to ensure they meet accessibility standards.
Checking Existing PDFs
- Are there accessibility errors?
To run Acrobat’s accessibility checker, go to All Tools > View More > Prepare for Accessibility > Check for Accessibility > Start Checking. The results panel will show any detected errors. Keep in mind that this tool won’t catch everything, but it’s a helpful starting point.Here are a few tips to get you started: - Is there actual text on the page?
Try highlighting the text. If you can’t, it’s likely an image of text—often the case with older, scanned PDFs—and will not be readable by screen readers. - Is the PDF tagged?
Tags provide structure and enable screen readers to interpret content correctly. A PDF may look fine visually but still be completely inaccessible if it’s untagged. Check tags using Adobe Acrobat Pro or free tools like AxesCheck.
More Resources: Creating Accessible PDF Documents
When using Microsoft PowerPoint to teach online, you may incorporate it in several ways:
- Sharing slides for download so students can view them on their own devices.
- Uploading the presentation to your learning management system (LMS) for students to view directly within the course.
- Displaying the slides during live video sessions to support instruction or discussion.
Regardless of how you deliver your PowerPoint presentation, there are several important accessibility and design considerations to keep in mind as you create it.No matter the end product, there are several things that need to be considered as you create the presentation.
- Choose a high-contrast design template. Good color contrast ensures that text and visuals are readable for all users.
- Use readable fonts. Choose sans serif fonts and set text at 28 points or larger for easy viewing.
- Use built-in layouts—not text boxes. Avoid starting with a blank slide. Instead, select a predefined layout that maintains accessibility structure.
- Include unique slide titles. Each slide should have a distinct heading to help screen reader users navigate your presentation.
- Avoid PowerPoint “Design Ideas.” Many of these suggested layouts do not meet accessibility standards.
- Add alternative text (alt text). Describe images, charts, and graphs so all users can understand the visual content.
- Limit animations and flashing elements. These can be distracting or trigger seizures for some viewers.
- Caption videos and provide transcripts for audio. Ensure all multimedia content is perceivable.
- Check the Outline View. Verify that slide text appears in the Outline View; missing text may not be accessible to screen readers.
- Run the Accessibility Checker. Use PowerPoint’s built-in tool to identify and fix accessibility issues.
- Provide an accessible PDF version. To create one, choose Save as PDF (not “Print to PDF”). This version is typically more accessible to screen reader users.
The resources below provide detailed instructions and examples for creating accessible slide presentations.
More Resources: Creating Accessible MS PowerPoint Presentations
Without alternative text, a blind person who is using a screen reader will not know what an image is. The screen reader will just say “graphic”. Most learning management systems offer the option to add alternative text. When you add a description, simply describe what is in the image. There is no need to say “image of” or “picture of”.
How to Add Alt Text
In MS Word and MS PowerPoint:
- Right click on the image
- Choose View Alt Text
- Write the description in the box that appears to the right of the document.
In learning management systems, the process varies but often you will be prompted to add alt text when uploading the image to your course.
More Resources: Accessible Images
Creating clear, descriptive link text can be challenging. In the effort to be concise, clarity is sometimes lost. For students using screen readers, this can pose a real barrier—since they often scan a list of links to navigate course content efficiently. When links lack meaningful descriptions, this navigation method becomes frustrating and unproductive.
Using clear, descriptive links improves accessibility and enhances usability for everyone. Below are some common issues with link text, along with suggestions for how to correct them.
| Common Problem | Sample of Problem | Suggested Solution |
|---|---|---|
| Documents are provided in multiple formats and links are given as format name only. | Homework Assignment #1: PDF Word Homework Assignment #2: PDF Word | Homework: Assignment #1 (PDF) Assignment #1 (Word) Assignment #2 (PDF) Assignment #2 (Word) |
| Introductory sentences are provided with links to “more” at the end of it. | Professor Wins Award for Accessible Course Design More… | Professor Wins Award for Accessible Course Design >> |
| A similar format to the above is often seen following a longer introductory paragraph. | Anytown University is moving all of its instruction online in order to reduce the spread of COVID-19. We will continue to provide updates to our campus community. Details… | Anytown University is moving all of its instruction online in order to reduce the spread of COVID-19. We will continue to provide updates to our campus community. Full article: Anytown University Response to COVID-19 |
| One of the most common problems is the use of the phrase “click here” as a link to more information. | Click here to go to the latest news on your university. | Get the latest news on your university>> |
| A full URL is provided as the link. | Here’s my latest blog entry: https://mycoolblog/really-long-blog-link-123444522523524 | My Latest Blog Entry |
More resources: Accessible Hyperlinks
Video content can be far more engaging than static materials and can add tremendous value to an online course. However, if accessibility is not considered, videos can create barriers for many students.
So, what should you keep in mind to ensure your video content is accessible?
- For videos embedded in a course, the video player needs to be accessible by keyboard and the controls need to be labeled properly so that a screen reader user can access all of the video controls.
- The video will need to be captioned.
- The visual content will need to be described.
- A transcript will need to be created that includes the captions and the descriptions of the visual content.
Accessible Video Players
The use of accessible video players is typically a decision made at an administrative level. It is worth asking about how such decisions were made. If you are using an LMS that allows you to embed your own videos, a good practice is also to include a link that goes directly to the source video (e.g. YouTube, Vimeo, etc.).
Using Captioned Videos
When choosing a video that has been created by someone else, make sure it is captioned. Automatic transcription does not provide equal access. See the next section for more details on choosing captioned videos and captioning your own videos.
Audio Description
Audio description refers to providing information about the visual aspects of a video to someone who is blind or who has low vision. Audio description can be provided as part of the general narration or can be added after the fact. If the video is simply a recording of you providing a lecture, then there would be little need for audio description. If you are also showing slides, you’ll want to describe what is in the slides. See more details about creating audio descriptions in Sharing Accessible Videos – Audio Description.
Providing a Transcript
Once you have your transcript for the captions and the audio descriptions, you can combine the two to create a document that will make your video accessible to students who are DeafBlind. Simply create an accessible MS Word document with this content and provide a link to it below the video.
Choosing Captioned Videos
When selecting videos created by others, always ensure they are properly captioned. As mentioned earlier, automatically generated captions do not provide equal access. Captions produced by artificial intelligence are often inaccurate, and even when mostly correct, they usually lack punctuation and capitalization, making them difficult to follow.
Below are suggestions for verifying whether videos are captioned and for finding captioned videos online.
Checking a Video for Captions
To determine whether a video includes true captions:
- Click the “CC” button at the bottom of the video player.
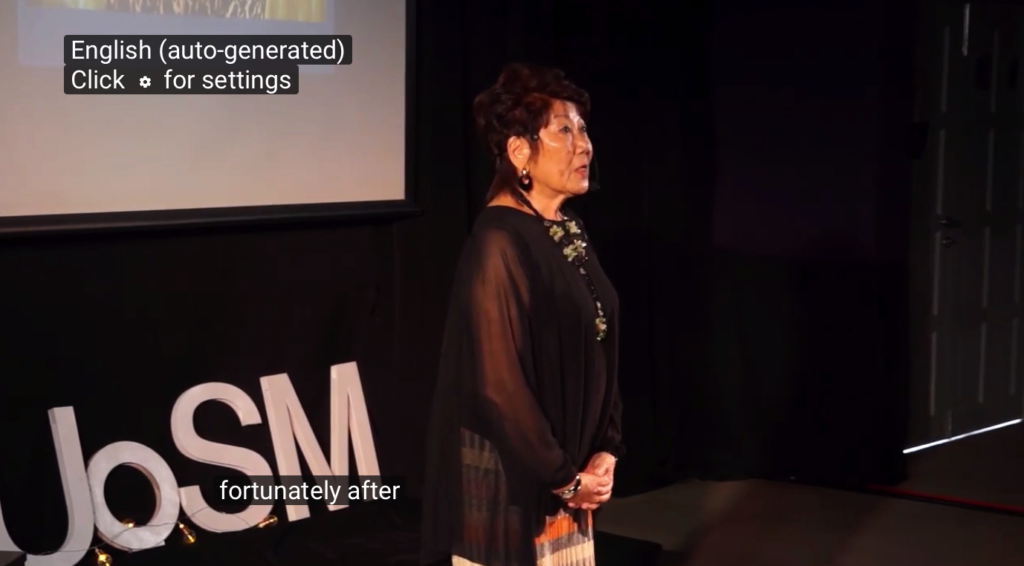
- Look for a label in the upper-left corner of the video.
- If the label says “English (auto-generated)”, the captions were created automatically and are likely inaccurate. (See first image.)
- If the label says “English captions” or something similar (see second image), the video includes a caption file that was uploaded manually. Even then, it’s a good idea to review the captions for accuracy before sharing.

Finding Captioned Videos
When searching for video content to share with students, you can narrow YouTube search results to show only videos with captions:
- Go to YouTube.com and enter your search topic.
- Click the Filter button (appears after you run your search).
- Under Features, select Subtitles/CC.
YouTube will then display only videos with caption files uploaded.
Always check captions for accuracy before sharing the video with students.
Captioning Your Videos
If you create your own video content, you’ll need to ensure it is captioned. This can be done either by you or with support from your institution.
Start by checking whether your campus provides assistance with captioning. Contact your disability resource office, instructional design team, or information and communications technology (ICT) department.
If support is not available, you can caption your videos yourself—or, if funding allows, outsource the work to a professional captioning service.
Options for Captioning on YouTube
If your videos are hosted on YouTube, there are several ways to add captions:
- Upload a transcript for YouTube to sync automatically.
Create a full transcript of your video content, upload it to YouTube, and allow YouTube to match the text with the spoken words in the video. - Edit YouTube’s automatic captions.
Upload your video and let YouTube generate automatic captions. Then open the caption editor to correct errors, add punctuation, and identify speakers. - Upload a timed caption file.
Use a captioning tool to create a transcript with timing information (e.g., in SRT or VTT format) and upload it directly to YouTube.
The resources below provide you with guidance for captioning your videos. Online captioning resources are also provided.
More Resources: Captioning Your Videos
Tutorials on Captioning
- NCDAE: Captioning YouTube Videos
- DCMP: Captioning Key
- University of Washington: Making Videos and Recorded Lectures Accessible
- YouTube Captioning Tutorial
Captioning Tools
As described in an earlier section, audio description provides verbal information about the visual elements of a video for viewers who are blind or have low vision. The amount of description needed depends on how much of the video’s meaning is conveyed visually rather than through dialogue or narration.
Use the questions below to determine which parts of your video may need additional audio description:
- Does the video include text-only content, such as credits, section titles, or on-screen statistics?
- Are the names or titles of speakers shown visually but not spoken aloud?
- Are presentation slides displayed without being described by the narrator?
- Are there visuals or graphics that convey essential information?
- Does the video include demonstrations that rely on sight to understand?
Any visual content that conveys meaning but is not described in the narration should be included in your audio description to make the video fully accessible.
Good audio descriptions clearly and concisely express what a viewer who cannot see the screen would otherwise miss. The resources below provide guidance and examples for creating effective audio descriptions.
More Resources: Creating Audio Descriptions
If you have a course that has several modules, it is helpful to organize each module in a similar way. This predictability helps many students navigate the course and makes it less likely that students will miss an important activity. Below is a sample organization that illustrates this consistency.
Universal Design 101
(Each item in the lists would actually be a link.)
Module 1: An Introduction to Universal Design
- M1 Video
- What is Universal Design? (YouTube) – CC
- What is Universal Design? (YouTube) – AD & CC
- What is Universal Design? Transcript (DOC)
- M1 Reading Assignments
- A Historical Perspective of Universal Design (PDF)
- Universal Design as a Philosophical Framework (PDF)
- The Principles of Universal Design (PDF)
- List of additional suggested readings (PDF)
- M1 Activities
- M1 Reaction Paper (DOC)
- M1 Questions to Ponder (Discussion Board)
- M1 Self-Test (DOC)
Module 2: Universal Design in Postsecondary Settings
- M2 Video
- Universal Design in Postsecondary Education (YouTube) – CC
- Universal Design in Postsecondary Education (YouTube) – CC & AD
- Universal Design in Postsecondary Education Transcript (DOC)
- M2 Reading Assignments
- Hidden Disabilities and Disclosure (DOC)
- Students with Learning Disabilities in Higher Education: A Growing Population
- Models of Universal Design (PDF)
- M2 Activities
- M2 Reaction Paper (DOC)
- M2 Questions to Ponder (Discussion Board)
- M2 Self-Test (DOC)
Notice that the link to different items also includes information about the format of that item. When a link does not include a format, most people would assume that would take a person to a web page.
Encourage students to use good discussion board etiquette. Using good subject headings is helpful to everyone. For example, instead of Question using a heading such as A Question about Module 1. This will help other students determine where to focus their time and energy in reading the discussion posts and be able to scan for the information they need. For more specific information, consult these Discussion Board Guidelines. You are also welcome to adapt and share those guidelines with your students.
Do you plan to meet with your class using a video conferencing tool? This can be a good way to connect with students remotely. There are several things to keep in mind to create an accessible experience for all students.
Selecting an Accessible Video Conferencing Solution
Perhaps your university has adopted a video conferencing tool already. You may want to check with your disability resource office or instructional technology department to make sure it is fully accessible. If you are selecting your own video conferencing platform, the following questions will help guide you toward selecting an accessible video conferencing tool.
- Does the company that makes the product have information about accessibility on their website?
- Do they offer keyboard shortcuts to navigate the application?
- Does the application have a way to provide captions?
- Does the application offer the option to connect by either computer or phone?
- Can you find information about the accessibility of this product from organizations other than the vendor themselves?
- Is this product being used by organizations that prioritize accessibility?
If you can also have the application tested by someone who knows about digital access, that is ideal.
Planning for Access
As you plan to lecture using video conferencing, remember that not all people will access your lecture the same way. Students who are deaf or hard of hearing may need captions or an ASL interpreter. Accessing the lecture using an ASL interpreter requires higher bandwidth than accessing just the audio of the lecture or watching a video with relatively little movement. Deaf students who live in rural areas may need support finding a location where they have that level of Internet access. Students who access the computer using assistive technology or the keyboard alone may find learning the keyboard shortcuts (if they do exist) to be time consuming. Offering the option to connect by phone and sending any visual materials such as PowerPoint slides in advance is a good practice. Also providing descriptions of what you are sharing visually is a good practice whether remote or face to face. This way, blind students and those joining by phone can follow along more easily.
During Your Class
Here are some tips for providing access during your lecture:
- Provide multiple means for people to ask questions (i.e. chat tool, unmuting the user so they can ask questions, and emailing you questions).
- If you are showing slides, announce when you are moving to the next slide.
- Make sure students have an accessible version of the slides in advance.
- Don’t assume that everyone can access the slides during your presentation. Read the content or provide all of the content as part of your lecture.
- If a captioner is joining to provide captioning, make sure the captioning is working properly before beginning your lecture.
- Record your lecture so that students who lose Internet connection can access it later.
More Resources: Access and Video Conferencing Tools
A highly accessible online course can reduce the need for individual accommodations. By following the suggestions in the previous sections and using an accessible LMS, students with disabilities can engage fully and proactively in the course. In a well-designed course, students with disabilities may participate seamlessly alongside their peers, sometimes without needing to contact the disability resource office.
Implementing Accommodations
Timed Exams
Timed exams—whether face-to-face or online—can present barriers for many students. When a timed exam is necessary, extended time is a common accommodation. The campus disability resource office typically determines the accommodations a student will receive. They then notify faculty of these accommodations. Upon receiving this notification, you are responsible for providing the additional time for the student to complete the exam or quiz.
Many learning management systems allow instructors to grant extended time for specific students. If your LMS does not support this feature, you may need to create a separate version of the exam with the appropriate time limit.
If you have questions about implementing this accommodation, contact your disability resource office for guidance.
Captioning
Even if you use videos that are captioned already, there are some situations where captioning will be needed as an accommodation. If you are using video conferencing technology to deliver a live lecture, your lecture will need to be captioned for deaf or hard of hearing students. Work with your disability resource office to make this arrangement. They will probably need to provide access to the lecture to a captioner and will work with you to get the appropriate link so the captioner can log in and provide captioning.
Other situations where captioning may be needed as an accommodation are with the use of chat or collaborative tools that include audio (i.e. VoiceThread or Kollective).
Sign Language Interpreters
Similar to captioning, provision of remote sign language interpreters may be requested when lectures are provided online. Again, your disability resource office should take the lead on arranging this, but may need to have access to the log in information so that the interpreter can join.
Alternatives to Inaccessible Course Components
Other accommodations in the online environment are typically a response to documents not being designed accessibly or instructors choosing applications that are not accessible. This might include the LMS itself or tools within the LMS such as chat or the exam tool. This could also include requiring students to visit a website that is inaccessible. Being proactive and checking for accessibility of applications and web resources will improve the experience of your students and reduce the need for retrofitting.
Additional Resources
- AccessDL: A project of University of Washington, DO-IT, this site offers a variety of resources related to accessibility and distance learning.
- National Center on Disability and Access to Education: The National Center on Disability and Access to Education (NCDAE) exists to address issues of technology and disability in education policies and practices to enhance the lives of people with disabilities and their families. Be sure to check out their cheat sheets.
- National Deaf Center: 10 Tips for Educators: This resource is provided in response to the rush toward online instruction. The National Deaf Center also offers many other helpful resources for educators.
- University of Washington: Getting Started with Digital Accessibility
- WebAIM.org: A project of the Center for Persons with Disabilities, Utah State University, WebAIM offers lots of resources to help people design with accessibility in mind and make their web content accessible to people with disabilities.
Our thanks to Increasing Capabilities Access Network (iCAN), a program of Arkansas Rehabilitation Services, for providing funding for this toolkit.